Advanced Editing
In the world of video editing, there are, broadly speaking, two common ways of working on an edit. Some applications treat the Edit (or “timeline” in other NLEs) as an interface, and others treat it as a reference. Lightworks leans toward the reference model; this may be unfamiliar to some users at first, but in practise, most editors find a great advantage in being able to edit without constantly moving their hands back and forth between the keyboard and mouse.
Audio editors will likely find this method of working quite natural, since most audio applications treat the timeline as a stretch of tape which you fast-forward and rewind, rather than click and drag around the screen. In fact, the same paradigm is at work; Lightworks treats the edit as a roll of film which you shuttle through, and cut footage into or lift footage from.
This tutorial will help you get familiar with the way Lightworks can maximise your efficiency and make your work more fluid.
Target Tracks
When moving a clip from its source viewer into your Edit, you can bring in either the video stream or the audio stream, or both.
The default is both.
This may or may not be the best default for you; since most productions use dual-system sound, you may have reference audio (or no audio at all) embedded along with your video with the master soundtrack in separate files. Either way, once you start editing together your shots, the need to move one stream without the other will arise.
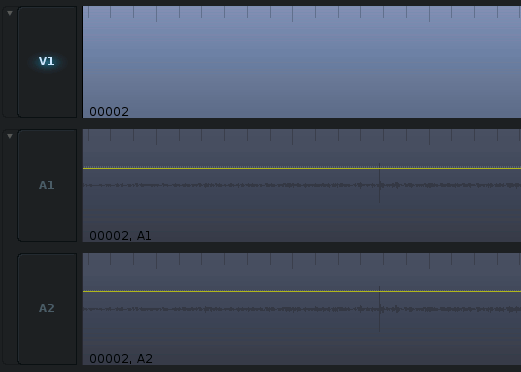
To move a clip of just video into your Edit, you must de-activate the audio tracks in the Edit window. Do this by either:
- Clicking on the audio track labels on the left of the Edit window
- Press
3to disable the first audio track and4to disable the second audio track
Once the audio tracks are disabled, send your clip into the Edit as either an Insert or Replace edit, and only the video track will be affected.
In practise, this goes a little something like this:
- Press
spacebarto play a clip in its source window. - Mark in with
i - Park the playhead at the endpoint of the clip by pressing
spacebarwhen you reach the desired out point. - Deactivate audio tracks by pressing
3,4. - Press
bto perform a replace (called an “overwrite” in some other applications) edit, orvto perform an insert edit (be careful when using an insert edit; it forces all following video to ripple forward without their accompanying audio. You will know if this has happened, because Lightworks will turn the out-of-sync tracks bright red in warning).
A fairly complex edit has been performed without ever taking your hands of the keyboard! This is only just the beginning; far more complex edits can happen in the timeline, with just as little mouse interaction.
Target Track: Audio
To manipulate audio tracks independently of video tracks, the concept is the same. Press 1 to de-activate the video track, and then perform your edit.
Trimming
Once you have reached a rough cut of your movie, you'll want to modify some of the cuts. Inevitably, there will be clipped lines, or cuts that accidentally include the slate still in the shot, and so on. It's therefore a very common task to move the in or out point of any given clip.
Moviemaking being what it is, seemingly simple trims usually carry along with them significant ramifications for the rest of the edit. Let's tackle each use-case one by one.
Removing Frames from the In Point of All Tracks
One of the simplest and most common trims you can perform is a trim that removes frames from both the video and audio tracks.
This is common because usually when you are doing a rough cut, you are a lot more liberal with how long you dwell on a shot. You'll cut into a shot a full second or two before the actor begins speaking, and only later, during the trimming stage, do you realise that this makes the cuts seem unnatural and awkward.
To trim off some frames from a clip, navigate to the clip you want to trim. On the keyboard, you can move from splice to splice by pressing a to move the playhead left and s to move the playhead right.
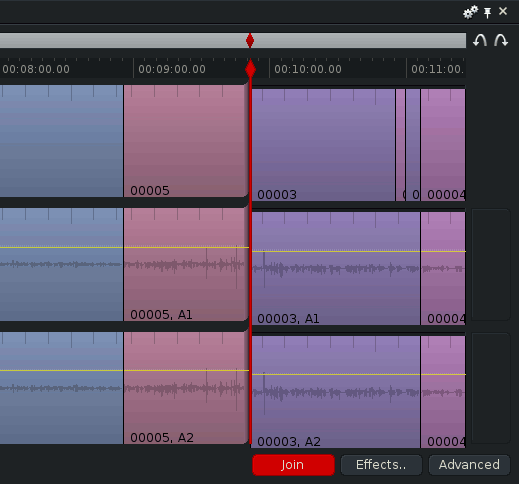
Once parked with the incoming frame of the clip located just to the right of your playhead, subtract frames (that is, move the in-point of your clip right, or later in time), press w to lift the in-point of the current clip out of the edit.
This creates a sort of floating-head on the clip; in other words, the in-point of the clip is “unjoined” from the rest of the edit and can now be manipulated.
Move the edit point further into the clip by pressing spacebar or l, which will cause the clip to play. The clip, since it is unjoined from the edit, will move with the playhead, later in time, until you press spacebar or k to stop the playhead.
If you trimmed too far, just move the playhead in reverse with j; once again, since the in-point is still unjoined from the edit, the head of the clip will move along with the playhead until you stop playback.
To join the clip back into the edit, press Tab.
Adding Frames from the In Point of All Tracks
If you have cut into a shot too late and want to add some padding to the beginning of the shot, then you need to add frames to the head of your clip.
Navigate to the clip you want to expand. On the keyboard, you can move from splice to splice by pressing a to move the playhead left and s to move the playhead right.
Once parked with the incoming frame of the clip located just to the right of your playhead, add frames (move the in-point of your clip left, or earlier in time), press w to lift the in-point of the current clip out of the edit.
This creates a sort of floating-head on the clip; in other words, the in-point of the clip is “unjoined” from the rest of the edit and can now be manipulated.
Move the edit point further into the clip by pressing j, which will cause the clip to play in reverse; as you rewind the footage, the unjoined clip moves with the playhead, adding frames to the total length of the clip, until you press spacebar or k to stop. If you trimmed too far, just move the playhead forward with spacebar or l; once again, since the in-point is still unjoined from the edit, the head of the clip will move along with the playhead until you stop playback.
To join the clip back into the edit, press Tab.
Adding Frames from the Out Point of All Tracks
Sometimes you cut out of a shot too early; maybe you clip off a line, or you cut before a meaningful smile is given, or you just feel that you need to linger a little longer for impact. Adding frames from the tail end of a clip is basically the same as manipulating the head of a clip.
Navigate to the clip you want to trim. On the keyboard, move from splice to splice by pressing a to move the playhead left and s to move the playhead right.
Once parked with the incoming frame (yes, the incoming frame) of the clip located just to the right of your playhead, you're at the correct clip, but you're at the wrong end. Press e to trim the end of the current clip.
The playhead moves to the end of the clip and lifts the tail end out of the edit.
Move the edit point further out by pressing spacebar or l, which causes the clip to play. As you play the previously truncated footage, the unjoined tail of your clip moves with the playhead, adding frames to the total length of the clip, until you press spacebar or k to stop.
To join the clip back into the edit, press Tab.
Removing Frames from the Out Point of All Tracks
Sometimes you cut out of a shot too late, and you need to tighten your edit either to meet the required Total Running Time, or to quicken the pace of the edit, or just to clean things up a bit.
Navigate to the clip you want to trim. On the keyboard, move from splice to splice by pressing a to move the playhead left and s to move the playhead right.
Once parked with the incoming frame (yes, the incoming frame) of the clip located just to the right of your playhead, you're at the correct clip, but you're at the wrong end. Press e to trim the end of the current clip.
The playhead moves to the end of the clip and lifts the tail end out of the edit.
Cut out of the shot earlier by pressing j, which will cause the clip to play in reverse. As you play backwards through the footage, the unjoined tail of your clip moves with the playhead, cutting frames from the total length of the clip, until you press spacebar or k to stop.
To join the clip back into the edit, press Tab.
Nudging
Playing forward or reverse along the timeline and dragging the head or tail along with you is a quick and efficient way to revise edit points, but sometimes greater precision is required. To nudge the edit points of a clip, use the left arrow and right arrow keys to move frame-by-frame.
Trimming Just the Video or Audio
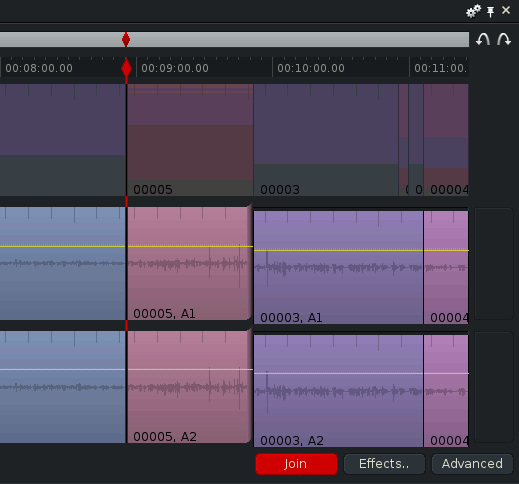
Combining your knowledge of working with audio and video tracks separately and of trimming clips in the Edit window, you can probably intuit how to trim audio tracks without trimming its accompanying video tracks, or video without the audio.
These kinds of edits (sometimes called “L” or “J” edits because of the tetris-like ways the clips start to fit in with each other) are quite common, especially in the ubiquitous OTS (over-the-shoulder) conversation sequences, wherein one character's audio plays underneath the video reaction shot of the other character.
To trim an audio track, for instance, without affecting the video track, disable the video track by pressing 1 on your keyboard, and trim your audio track.
The same basic procedure can be used to trim video without affecting the accompanying audio tracks.
To get more familiar with advanced methods of trimming clips, continue on to the next section.


